
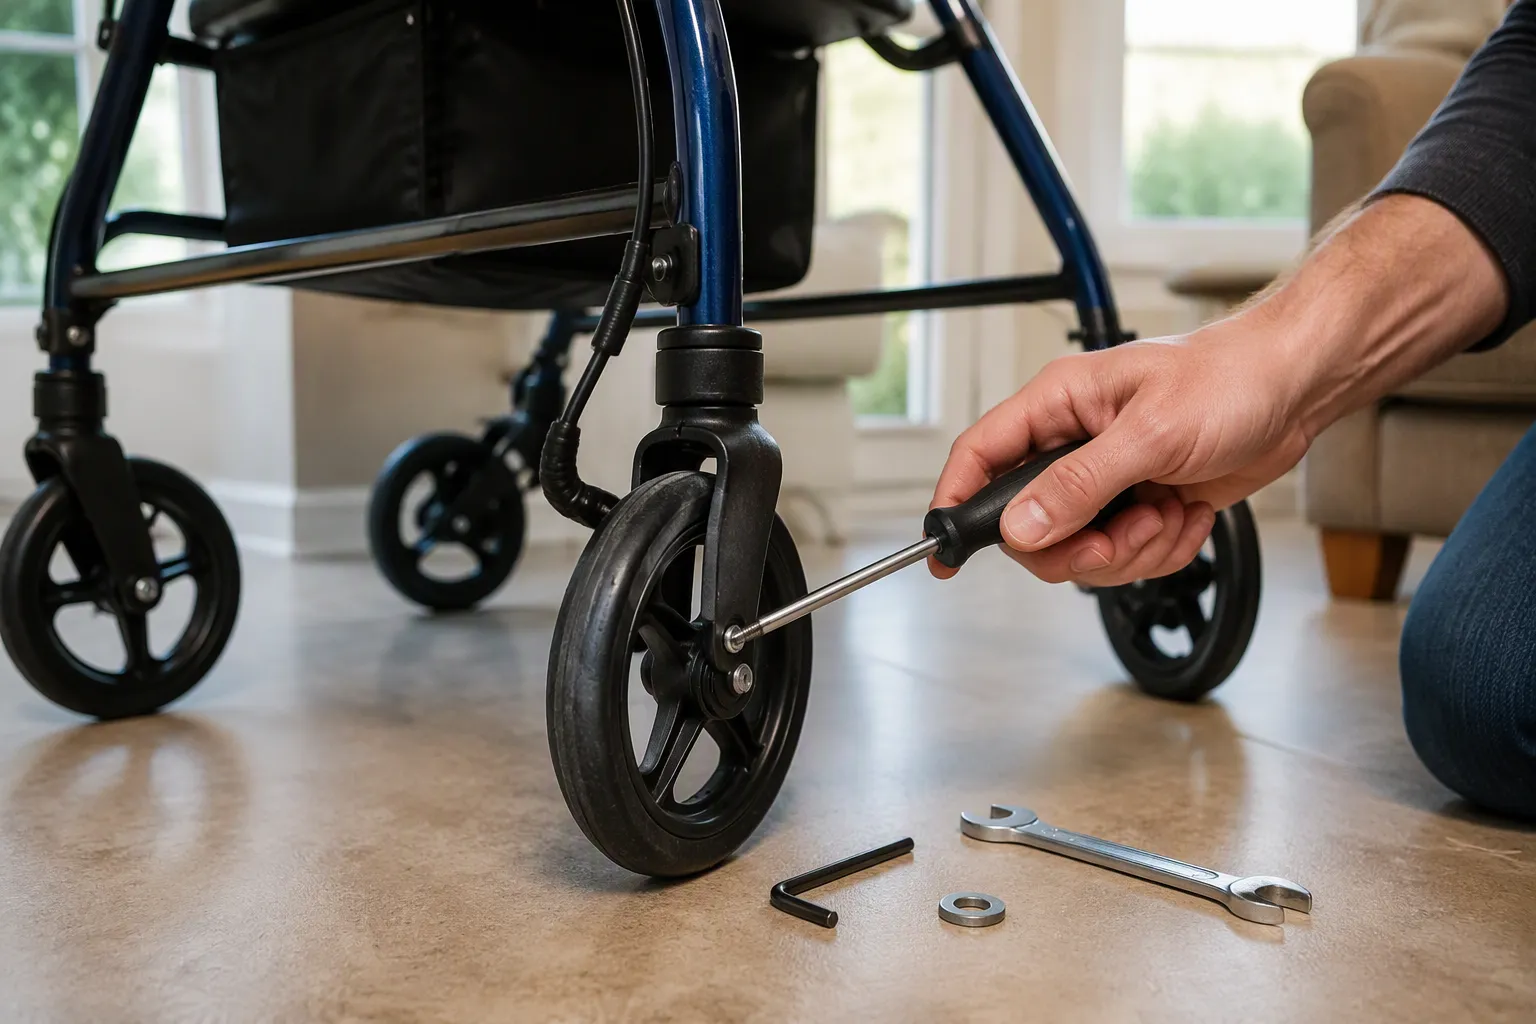
People often ask why does a rollator rattle after a few months of regular use. The answer involves normal wear: bolts loosen, the frame compresses, and seat bars begin to contact plastic components. Common culprits include:
- Loose bolts or parts that are not fully tightened
- Wheels that are not secure
- Brakes that are rubbing
- Objects clanking around when the rollator is moved
This rattle typically stems from loose parts or worn contact points, not a broken frame. Most cases of this noise are easy to fix at home in minutes with an Allen wrench, a screwdriver, or a small piece of padding. If the sound continues after tightening and padding, replacement parts or customer service can help.
The Real Reason a Rollator Rattles
People often ask why does a rollator rattle after months of use. The answer begins with normal mechanical wear. A rollator is not a static object. Every push and roll sends vibration through the rollator frame. These small forces combine with daily folding and unfolding to produce a predictable pattern of loosening and compression. The possible causes all trace back to this process. The frame does not need to be defective. It only needs time.
Loosening Happens With Normal Use
Bolts Loosen From Vibration
Vibration attacks every connection point. The wheels introduce constant low-frequency impact as they cross thresholds, rugs, and sidewalk cracks. The impact travels up the legs, into the crossbar, and across the seat brackets. Each shock works against the threads of every screw and bolt. Engineers describe the result plainly:
A walking rollator is a mechanical device subject to constant vibration and stress. Over time, the nuts and bolts that hold the frame together can vibrate loose. A wobbly wheel or a loose handle might seem like a minor annoyance, but if a bolt falls out while you are leaning on the walking rollator, the frame could collapse instantly.
This vibration rotates fasteners in small increments. A bolt that begins tight can turn almost imperceptibly with each step. Over time, loose bolts create contact between moving parts. That contact produces the first faint noise. Eventually, the noise from your rollator becomes unmistakable. The screw holding a brake bracket may rotate just enough to click. The bolt on a front fork may work itself free of its nylon patch. In both cases, the result is the same: a small gap opens where a rigid connection used to exist.
Repeated Folding Adds Stress to Joints
Folding and unfolding places continuous mechanical stress on a frame’s hinge and joint areas. A simplistic folding design concentrates this stress at a single point. A high-quality hinge spreads force across several contact points and uses locking geometry to resist wobble. This design maintains proper alignment even after hundreds of fold cycles. Hinge wear is one of the earliest indicators that a folding frame is losing its long-term precision. It leads directly to looseness and, later, a rattle. An overbuilt hinge preserves alignment better than a lightweight one because real-world users fold and unfold their frames in tight spaces.
This repeated action causes the metal surfaces to polish each other. The polished surfaces leave tiny gaps where components used to fit firmly. Every rollator follows the same pattern. The hinge becomes slightly freer, and the frame begins to transmit small shocks through each joint. Those shocks magnify the vibration from the wheels. The combination of rolling impact and hinge wear creates the underlying looseness behind most rattles.
Compression Changes the Frame
Seat Bars Press Against Plastic Covers
Most rollators have a seat supported by two horizontal bars. Those bars attach to the frame with brackets and screws. When a user sits down, the bars carry the load and transfer it to the side frames. Over time, the frame compresses under this weight. The compressed frame allows the seat bars to shift a few millimeters. Those millimeters are enough for the bars to hit the plastic seat cover or side panel. A bar that barely cleared the plastic on day one can now clack against the frame on every step. The sound may seem to come from the seat itself. In reality, the seat is fine. The contact point between the bar and the plastic surround is what produces the click.
Rubber Bushings and Washers Wear Down
The frame uses rubber bushings and plastic washers to cushion metal-to-metal contact. These parts are soft. They wear down faster than the aluminum or steel tubes they protect. The rubber compresses under load. Metal parts move closer together. This movement removes the original cushioning. Metal parts then strike each other. This causes a sharper, more metallic rattling than the dull click of a loose bolt. A worn bushing can also change the angle of a hinge. That angle shift puts extra pressure on one side of a joint and creates an uneven gap. Any uneven gap becomes a source of movement and sound.
Why the Noise Appears After a Few Months
The Break-In Period
New rollators have tight tolerances. Screws arrive fixed at the factory. Rubber bushings have full thickness. The frame parts sit in their intended positions. During the first weeks, daily use begins a break-in period. Vibration settles the fasteners. Folding flexes the hinge points. Weight compresses the seat bars. This process does not require a defect. It happens to every rollator. The first few months act as a settling phase for the entire assembly.
Small Gaps Grow Into Audible Rattles
The break-in period creates small gaps. A gap of one millimeter may not make a sound at first. After additional use, the gap widens. The widened gap allows a part to move before it meets resistance. That movement creates a repetitive knock. A rattling noise from your rollator often appears suddenly because the gap finally crosses a threshold. Before that threshold, the frame remains quiet. After it, every step produces a click or clank. The transition is gradual under the surface but sharp to the ear. A rollator being noisy does not mean the frame is broken. The sound simply reflects the new freedom in worn contact points. This gradual sequence explains why does a rollator rattle after a few months.
Is a Rattling Rollator Safe to Use?
A rattle alone does not mean the frame is failing. Many causes remain cosmetic. Some sounds, however, require immediate attention. The danger depends on the source.
Harmless Rattles vs. Warning Signs
Loose Cosmetic Covers and Clips
Plastic seat covers, cable clips, and decorative shrouds can rattle without affecting stability. These parts shield the frame; they do not support weight. A user can often silence them by pressing the clip or adding a small pad. According to the manufacturer, the seat’s side bars can contact plastic components underneath. Heavy use compresses the frame structure, and the seat bars begin to clack against that plastic whenever the walker is jostled. This type of rattle remains annoying rather than dangerous.
Wobbling Wheels or Brake Issues
Rattling, squeaking, or grinding sounds often signal wear in the frame, brakes, or moving parts. Users should not ignore these sounds. Ignoring them can escalate into serious mechanical problems. A technician should locate the source, lubricate moving parts, or repair worn components. A grinding noise from a joint demands prompt action. A wobbling wheel changes the walker’s path and stresses the fork. Intermittent brake catching can jerk the frame. The sound of brakes rubbing indicates drag and creates heat. Both conditions need repair.
Even a slight bend in the frame from an impact, a drop, or twisting during folding can make the whole unit unstable. A bent frame is not safe. It usually requires replacement. Users may unconsciously alter their walking pattern to compensate for instability. That adjustment strains the back, knees, or hips. It also increases the risk of tripping. Caregivers should not ignore wobbling, even when it seems minor.
Do a Quick Safety Check First
Before deciding whether the rattle is harmless, a user should perform a simple inspection. The table below lists the critical components.
| Component | Inspection Method | Warning Signs | Expert Recommendation |
|---|---|---|---|
| Nylon plastic foot pads | Visual check and stability test | Wear, deformation, looseness, or slipping | Replace immediately if visibly worn |
| Folding locks | Push and pull the frame | Wobbling or shifting more than 0.4 inches | Repair or decommission immediately |
| Handgrips | Twist the grips firmly | Looseness, spinning, or sliding | Replace or re-glue to ensure a tight grip |
| Brakes | Squeeze and push the walker | Failing to stop or pulling to one side | Adjust brake cables before next use |
Test the Brakes and Locking Mechanisms
The user must confirm the hand brakes engage smoothly. The wheels should rotate freely without wobble. The parking brakes must lock securely. Brakes are a primary safety feature, especially when sitting down or standing up from the seat. Once a technician confirms the brakes aren’t dragging slightly, the rattle likely comes from another area.
Push and Pull the Frame
The user should fold and unfold the walker several times. Then they should push down on the seat and pull the frame side-to-side. Any movement in the hinge or crossbar indicates looseness. A stable frame absorbs pressure without flex. This simple test reveals the difference between a cosmetic rattle and a structural one.
The question why does a rollator rattle after a few months now has a clearer answer. Most rattles remain safe. A professional can identify the few that are not.
How to Find the Loose Parts Causing the Rattle
Locating the source of the noise requires patience and a systematic approach. A user should not guess at random. Instead, they can follow a clear process to isolate the loose parts responsible for the sound.
Gather the Right Tools
Allen Wrench, Screwdriver, and Lubricant
Most rollator hardware uses metric Allen bolts or Phillips screws. A basic tool kit should include a set of Allen wrenches, a screwdriver with interchangeable bits, and a can of silicone spray. A small flashlight helps illuminate dark joints. A piece of felt or rubber tape is useful for temporary padding. These tools cost little and fit easily in a drawer.
Have a Helper Listen While You Walk
A single person cannot easily walk and listen at the same time. A helper can walk beside the user and crouch near the frame. The helper should note the exact moment the rattle occurs. Does the sound appear when weight shifts to the left side? Does it happen only when the rollator rolls over a bump? This information narrows the search area quickly.
Inspect Common Contact Points
Seat Bars, Crossbar, and Brake Cables
The seat bars and crossbar carry the most stress. A user should inspect the screws that hold these parts. They should also check the brake cables. A loose cable clip can tap against the frame with every step. The user can wiggle each cable by hand to test for movement.
Wheels, Forks, and Folding Hinges
The wheels and front wheel forks deserve close attention. A user should lift each wheel and spin it. A rough or grinding sensation points to worn wheel bearings. The front wheel forks may also develop play where they meet the frame. Folding hinges collect dust and lose lubrication over time. A dry hinge produces a distinct creak rather than a rattle.
Reproduce the Noise on Purpose
Test on Flat and Uneven Ground
The user should push the rollator across a flat floor first. Then they should move to carpet, grass, or a sidewalk. Uneven ground forces the frame to flex. This flex often reveals the exact joint that rattles. A rolling noise that changes with surface type usually comes from the wheels or forks.
Fold and Unfold the Rollator
Folding and unfolding the rollator isolates hinge and locking mechanism problems. The user should listen carefully during each fold. A click at the halfway point suggests a worn hinge pin. A rattle after the frame locks into place points to a loose crossbar bracket. This simple test takes only a minute and provides clear diagnostic information.
Step-by-Step Ways to Reduce the Noise

Most walking frames respond to a simple repair routine. Three repair strategies reduce the noise: securing loose hardware, adding soft padding at contact points, and lubricating moving joints. Following this sequence quiets most rattles without disassembling the entire frame.
Tighten All Visible Hardware
Snug Bolts Without Over-Tightening
The first step focuses on visible bolts. A user should inspect every screw that connects the seat bars, crossbar, brake brackets, and folding hinges. Many fasteners loosen slowly during daily use. A quarter-turn with an Allen wrench often restores the original fit.
Torque settings keep the operation safe. Different frame locations require different values. The table below lists typical recommendations.
| Bolt location | Recommended torque | Notes |
|---|---|---|
| Pivot points | 15–20 Nm (11–15 lb-ft) | Tight enough to prevent loosening while allowing smooth folding |
| Cross-braces | 10–15 Nm (7–11 lb-ft) | Secure frame without causing distortion |
| Secondary connections | 8–12 Nm (6–9 lb-ft) | Use unless otherwise specified |
| No torque wrench available | Pivots: hand-tight + ½ turn; Cross-braces: hand-tight + ¼ turn | Feel-based alternative |
A user should confirm these values with the manufacturer when possible. The user should return to the first bolt after tightening the last one. Fasteners settle during the first hours of use. Retorque after 1–2 hours or days to address break-in settling.
Excess force strips threads or distorts thin brackets. The user should stop at the first sign of resistance. A snug, stable connection beats a forced one.
Use Thread Lock on Problem Bolts
Some fasteners loosen repeatedly even after a correct torque. A liquid thread-lock compound solves this issue. The user applies a single drop to clean threads and inserts the fastener. The compound fills microscopic gaps and prevents vibration from rotating the screw.
A dry silicone lubricant serves a different role. A drop of silicone lubricant works well for lubricating cross screws and hinge pins without leaving residue. This step makes future adjustments easier and prevents corrosion. Thread locker and lubricant should never be mixed on the same connection.
Add Padding at Contact Points
Felt Pads or Rubber Tape
Securing hardware removes one source of movement but not all of them. Some parts still touch each other. A thin layer of padding absorbs the impact. Self-adhesive felt pads and rubber tape work well for this purpose. The user cuts a small strip, peels the backing, and presses it onto the contact surface.
Padding works best on flat areas. A pad should cover the full length of the contact zone. If the pad is too small, the part can shift and miss the cushion. The user should test the walker after applying each pad. A pad that moves or peels off needs a larger piece or a different attachment method.
Wrap Seat Bars That Touch Plastic
Seat bars often develop contact points with plastic side panels after months of compression. Metal-to-plastic contact can cause friction and squeaks. The solution is a soft barrier between the two surfaces. The user wraps the seat bar with a strip of felt or rubber tape at the exact spot where it meets the plastic.
This simple addition can reduce some of the noise immediately. The barrier also protects the plastic from further wear. The user should check the wrap periodically and replace it when it becomes thin.
Lubricate Moving Parts
Silicone Spray for Joints and Hinges
Moving joints need lubrication. A silicone-based spray keeps hinges smooth without damaging plastic parts. Silicone spray also conditions brake cables and plastic shrouds.
WD-40 Specialist Dry Lube is ideal for lubricating in gritty environments because it resists dust and dirt well, and it is suitable for many surfaces including most plastics. The same source also notes that WD-40 Specialist Silicone spray conditions plastics and cables.
A dry film lubricant leaves a clean surface. This approach targets the root of the noise. A noisy hinge becomes quieter after one application.
Avoid Grease That Attracts Dirt
Not all lubricants suit a walking frame. Heavy grease attracts dust and grit. The dirt sticks to the lubricant and forms a grinding paste. This paste wears down hinge pins and bushings faster than normal use.
| Acceptable lubricants for hinges and joints | Avoid | Reason | Application note |
|---|---|---|---|
| Silicone spray or light machine oil | Greasy lubricants | They attract dust and dirt | Apply in small amounts and wipe off excess to avoid attracting dust |
| Silicone-based lubricant or light machine oil | — | — | Keeps hinges and joints moving smoothly |
A user should apply lubricant sparingly. One or two drops on a hinge pin is enough. Wipe away any excess with a clean cloth. Keep the spray away from the wheels and brake pads. Brakes need friction, not lubrication.
A rollator stays quiet when maintenance becomes routine. A simple maintenance routine takes only a few minutes each month. These simple actions prevent small gaps from growing into audible clanks.
Adjust Frame and Seat Alignment
Tightening bolts and adding padding address many rattle sources. Some noises persist because the frame itself sits out of alignment. A seat bar that tilts slightly or a crossbar bracket that shifts from its original position creates new contact points. These contact points produce clicks and clanks with every step. Realigning the frame restores the original geometry. This step often eliminates rattles that tightening alone cannot fix.
Re-Level Seat Bars
Seat bars carry the user’s weight during sitting and standing. These bars attach to the side frames with brackets and bolts. Over months of use, the bars can shift out of level. One side may sit a few millimeters lower than the other. This imbalance changes how the seat contacts the frame. The lower side presses harder against its bracket. The higher side lifts slightly and creates a gap. Both conditions generate movement and sound.
A user can check seat bar level with a simple method. They place the rollator on a flat floor. They then place a small bubble level across the two seat bars. If the bubble sits off-center, the bars are not level. A visual check also works. The user crouches behind the rollator and compares the height of each bar against the frame. A noticeable difference indicates misalignment.
Re-leveling the seat bars requires basic tools. The user loosens the bolts that hold each seat bar bracket. They apply gentle pressure to the higher bar until both bars sit even. They then retighten the bolts to the recommended torque. This process may require two or three attempts. Small adjustments produce the best results. The user should test the rollator after each adjustment. A short walk across a hard floor reveals whether the rattle persists.
A helper can assist with this task. One person holds the seat bars in position while the other tightens the bolts. This teamwork prevents the bars from shifting during tightening. The helper can also listen for sounds while the user walks. This feedback confirms whether the adjustment worked.
Seat bar alignment affects more than noise. A level seat provides stable support during sitting and standing. An uneven seat forces the user to compensate with their body. This compensation strains the hips and lower back. Proper alignment improves both comfort and safety.
Re-Seat Crossbar Brackets
The crossbar connects the two side frames and provides structural rigidity. Crossbar brackets hold this bar in place. These brackets endure constant stress during folding, unfolding, and rolling. Over time, a bracket can shift from its seated position. The bracket may rotate slightly or slide along the frame tube. This movement creates a gap between the bracket and the frame. The gap allows the crossbar to flex with each step. The flexing produces a rhythmic clank.
A user can identify a loose crossbar bracket through visual inspection. They examine the area where the crossbar meets each side frame. A bracket that sits at an angle or shows a gap indicates misalignment. The user can also grasp the crossbar and push it side to side. Any movement at the bracket confirms the problem.
Re-seating a crossbar bracket involves several steps. The user first loosens the bracket bolts. They then push the bracket firmly against the frame tube. They align the bracket with any factory marks or indentations. These marks indicate the correct position. The user holds the bracket in place and retightens the bolts. A second person can help by holding the crossbar steady during this process.
Some crossbar brackets use pins or tabs that fit into holes on the frame. These features ensure proper alignment. The user should confirm that each pin sits fully inside its hole. A pin that rests on the surface rather than inside the hole allows movement. The user can tap the bracket gently with a rubber mallet to seat the pins. They should avoid metal hammers that might damage the frame finish.
After re-seating the brackets, the user tests the rollator on different surfaces. They push it across a hard floor, carpet, and uneven ground. They listen for any remaining sounds. A successful adjustment eliminates the crossbar clank. The frame feels more solid during use.
Crossbar alignment also affects folding performance. A misaligned crossbar makes folding difficult. The frame may resist closing or require extra force. Proper alignment restores smooth folding action. This improvement reduces stress on hinges and locking mechanisms.
A user should check crossbar brackets every few months. This simple inspection catches misalignment before it produces loud rattles. Early correction prevents wear on surrounding parts. It also extends the life of the rollator frame.
Frame and seat alignment work together to reduce the noise. A level seat and a properly seated crossbar eliminate many contact points. These adjustments require only basic tools and a few minutes of effort. The result is a quieter, more stable rollator that serves the user reliably.
When Fixes Do Not Stop the Rollator Rattle
Tightening, padding, and lubricating solve most rattles. Some noises persist despite these efforts. Persistent sounds indicate deeper problems that require replacement parts or professional attention.
Signs You Need Replacement Parts
Stripped Bolts or Cracked Brackets
A bolt with damaged threads cannot hold tension. The fastener spins freely inside its hole. Tightening provides no benefit. A cracked bracket flexes under load and creates new contact points. These conditions demand immediate part replacement.
If something is missing or stripped, replace it before using the walker again. A wobbly frame can be a serious safety issue, so don’t let those little parts slide.
Several warning signs indicate that tightening and padding will not solve the problem:
- The frame is wobbly or tilted, suggesting a structural problem rather than a simple loose fastener.
- The frame is bent or cracked, which cannot be corrected by tightening or padding.
- An unpleasant sound is heard alongside the rattle, indicating deeper structural damage.
- A part is missing or stripped, meaning it must be replaced before further use.
- Structural concerns are present, which should not be addressed with DIY implements and instead require professional assistance or replacement parts.
Worn Bushings and Damaged Wheels
Rubber bushings lose their cushioning ability over time. Metal parts then grind against each other. Damaged wheels develop flat spots or wobble during rotation. A wobbly wheel changes the rollator’s path and stresses the fork. These parts require replacement rather than adjustment.
Ordering Spare Parts Correctly
Find the Model Number
Replacement parts are not universal. A part may look similar online but fail to fit the exact model. The user should check the rollator brand and model name before buying. They should also verify wheel size, left or right side placement, brake design, and weight capacity information. Product photos alone do not guarantee compatibility.
Use the Manufacturer’s Parts Diagram
The manufacturer’s parts diagram provides exact part numbers. The user should follow these steps:
- Confirm the exact rollator model before ordering.
- Identify the serial number prefix because some parts differ by serial number.
- Consult the online parts diagram or the user manual to find specific part numbers.
- Use the model-specific parts list to select genuine replacement components with correct diameter, side placement, and attachment method.
- Source genuine replacement parts from reputable suppliers to guarantee compatibility and quality.
For safety-related parts, the user should confirm compatibility with the original seller, manufacturer, or a mobility equipment provider.
Temporary Fixes While Waiting
Pad and Tape the Noisy Joint
A temporary pad reduces the noise until new parts arrive. The user wraps felt tape around the loose joint. This padding absorbs vibration and limits movement. The fix lasts only a short time. The user should inspect the pad regularly and replace it when it wears thin.
Limit Rough Terrain Use
Rough terrain accelerates wear on damaged parts. The user should stick to smooth, flat surfaces while waiting for replacements. This restriction reduces stress on the frame and prevents further damage. The user should avoid gravel, grass, and uneven sidewalks until repairs are complete.
Contacting Customer Service About the Rattle
A persistent rattle sometimes requires professional support. Customer service teams handle these cases every day. They can identify the problem, supply replacement parts, and advise on repairs. A user should prepare specific information before making the call. This preparation speeds up the process and leads to a faster solution.
What to Prepare Before Calling
Model Number, Purchase Date, and Photos
The user should locate the model number on the frame label or in the user manual. The purchase date helps the representative check warranty coverage. Clear photos of the noisy area provide visual evidence. The user should capture images of the seat bars, crossbar, hinges, and any visible damage. These details allow the representative to understand the situation without guessing.
Clear Description of the Noise
A precise description helps the representative diagnose the issue. The user should note when the noise occurs. Does it happen during walking, folding, or sitting? Does it come from the front, back, or center of the frame? The user can also describe the sound itself. A metallic clank differs from a plastic click or a grinding squeak. This information narrows the list of possible causes.
What Customer Service Can Do
Warranty Hardware and Parts
Most rollators carry a limited warranty. This warranty typically covers frame defects and hardware failures. The representative can ship replacement bolts, bushings, or brackets at no cost. The user should ask about specific coverage terms. Some warranties exclude wear items like wheels and brake pads. Knowing these details prevents surprises.
Model-Specific Repair Advice
Customer service representatives know their products well. They can walk the user through specific repair steps. They may identify a known issue with a particular model. They can also recommend approved lubricants or tightening sequences. This guidance saves time and prevents damage from incorrect repairs.
When to Request a Replacement Unit
Rattles Return After Multiple Repairs
Some rollators develop recurring rattles despite repeated fixes. The user may tighten every bolt and replace every bushing. The noise still returns after a few weeks. This pattern suggests a deeper manufacturing issue. The user should document each repair attempt. A representative can then evaluate whether a replacement unit makes more sense than continued repairs.
Frame Damage That Can’t Be Fixed
A bent or cracked frame poses a safety risk. No amount of tightening or padding corrects structural damage. The user should inspect the frame for visible bends, cracks, or deep dents. If these signs appear, the user should stop using the rollator immediately. Customer service can arrange a replacement or recommend a suitable alternative.
How to Prevent a Rollator Rattle in the Future
Prevention costs far less effort than repair. A consistent care routine keeps the frame tight and quiet for years.
Start a Simple Maintenance Routine
Monthly Loose Parts Check
A monthly inspection catches problems before they produce sound. The user should gently shake the rollator to detect wobbling or rattling. They should confirm the frame folds and unfolds smoothly. Any loose screw or bolt requires immediate tightening with a screwdriver or wrench. This simple habit keeps legs and wheels even and secure. A weekly quick check works even better for daily users.
Quarterly Lubrication
Moving parts need regular lubrication to prevent friction and noise. The user should apply a small amount of silicone spray or light machine oil to wheel pins, hinges, and brake cables. They should wipe away excess oil with a clean cloth to avoid slipping. This step ensures smooth movement and prevents the rolling noise that develops when joints dry out.
Handle Your Rollator With Care
Avoid Slamming When Folding
Folding habits directly affect frame tightness. Frequent use over long distances or storage with minimal care causes equipment to deteriorate. Dropping the rollator or adding excess weight to one side bends or misaligns the frame. A bent frame produces a shaking sensation and balance-displacing instability. The user should fold and unfold the device gently every time.
Keep It Dry and Clean
Dirt, dust, and moisture accumulate on the frame, especially with outdoor use. These elements turn into rust or obstruct moving parts. Regular cleaning prevents this damage. The user should wipe the frame with a damp cloth and mild soap. Cleaning the wheels removes debris that causes wear. Thorough drying after cleaning prevents rust formation. The user should store the rollator in a cool, dry place.
Know When to Replace the Rollator
Typical Lifespan of a Rollator
Rollator walker tires typically last between six months and a few years. Actual lifespan depends on usage frequency, terrain type, and tire quality. Daily use on rough surfaces shortens tire life. Occasional indoor use extends it considerably. For daily users, tires should be inspected every 6–12 months. For occasional users, an annual inspection is recommended.
| Equipment Type | Standard Replacement Period |
|---|---|
| Rollator with seat (4-wheel) | 5 years from ownership transfer |
| Standard walker | 5 years from ownership transfer |
Signs It’s Time for a New One
Several warning signs indicate replacement is necessary. Worn tread reduces grip and causes slipping. Cracks or splits appear as rubber tires dry out. An uneven or bumpy ride indicates uneven tire wear. Difficulty turning or maneuvering suggests worn tires have lost ground grip. Noisy wheels may signal worn tires. If the rollator no longer rolls smoothly, tires should be replaced immediately.
For bariatric or higher-weight users, walkers may wear out significantly faster than 5 years — some Medicare beneficiaries report only 12–18 months of use before the frame fatigues or rubber tips degrade beyond safe use.
A frame that is bent, cracked, or damaged beyond repair requires replacement. A seized rolling mechanism or frame fatigue making the device unstable also signals the end of safe use.
A rattle after a few months represents normal wear, not a sign of failure. This observation answers why does a rollator rattle: loose hardware or seat bars contacting plastic components. A quick routine of tightening, padding, and lubricating reduces the noise. If the rattle continues, spare parts and customer service provide reliable next steps. Regular maintenance keeps a rollator quiet, stable, and safe for years.
FAQ
Why does a rollator rattle after a few months?
Normal use loosens bolts and compresses the frame. Seat bars then contact plastic components. Vibration from the wheels also works fasteners loose over time. This process happens to every rollator and does not indicate a broken frame.
Is a rattling rollator still safe to use?
Most rattles come from loose covers or worn contact points. These sounds remain harmless. A user should check the wheels, brakes, and folding locks first. Wobbling wheels or dragging brakes require immediate repair. A stable frame with a cosmetic rattle poses no danger.
How can a user find the source of the rattle?
A helper can listen while the user walks. The user should test the rollator on flat and uneven ground. Folding and unfolding isolates hinge problems. Checking the wheels, seat bars, and crossbar reveals the loose part quickly.
What tools fix a rattling rollator?
An Allen wrench, screwdriver, and silicone spray handle most repairs. Felt pads or rubber tape cushion contact points. A thread-lock compound secures problem bolts. These tools cost little and fit in any drawer.
Can lubrication stop the rattle?
Silicone spray quiets dry hinges and joints. A user should apply it sparingly and wipe away excess. Heavy grease attracts dirt and damages the wheels over time. Dry lubricants work best for rollator maintenance.
When should a user replace rollator parts?
Stripped bolts, cracked brackets, and worn bushings require replacement. Damaged wheels with flat spots also need new parts. A user should find the model number and use the manufacturer’s parts diagram. Genuine parts ensure proper fit.
How does a user prevent future rattles?
A monthly check catches loose bolts early. Quarterly lubrication keeps hinges and the wheels moving smoothly. Gentle folding prevents frame stress. Regular cleaning removes dirt that wears down moving parts. This routine keeps the rollator quiet for years.
When should a user contact customer service?
A user should call when rattles return after multiple repairs. Frame damage that cannot be fixed also warrants a call. Photos, the model number, and a clear noise description speed up the process. Customer service can ship warranty parts or arrange a replacement.